Do you love cake? Do you love popsicles? Try cake popsicles! They are fun and tasty. You can make them at home. Follow these steps to create yummy treats.
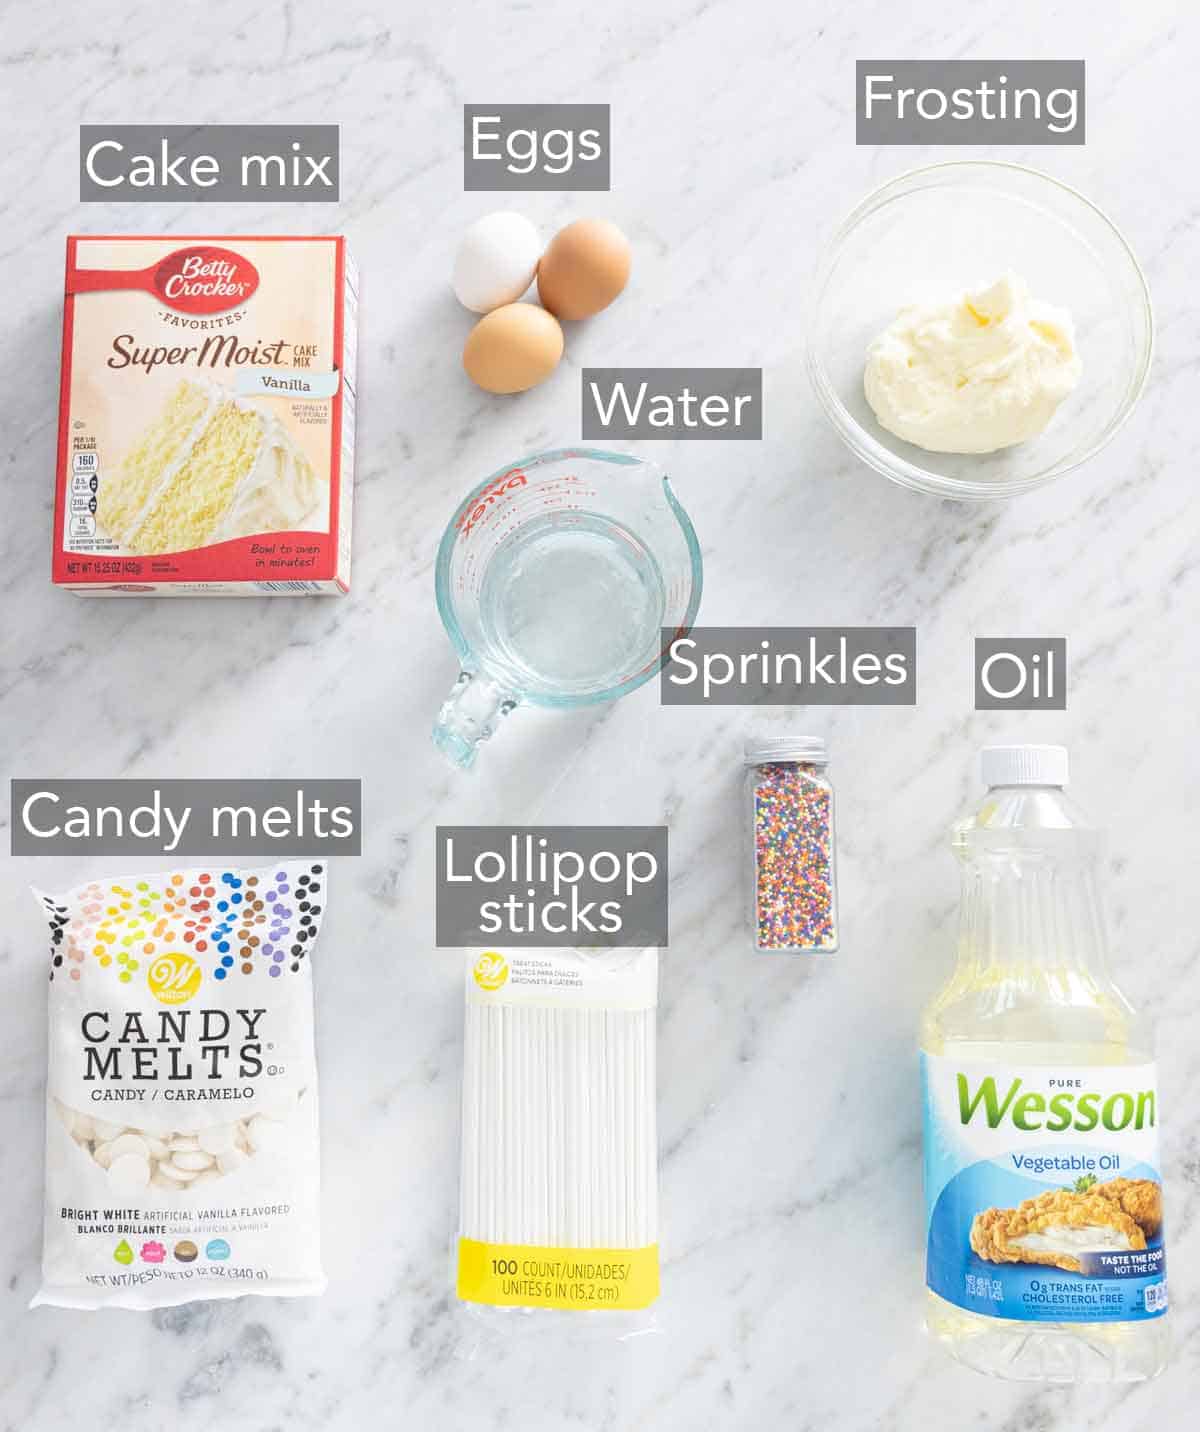
Ingredients You Will Need
1 box of cake mix (any flavor)
Ingredients needed to make the cake (check the box)
1 can of frosting (any flavor)
Chocolate or candy melts (for coating)
Popsicle sticks
Sprinkles or toppings (optional)
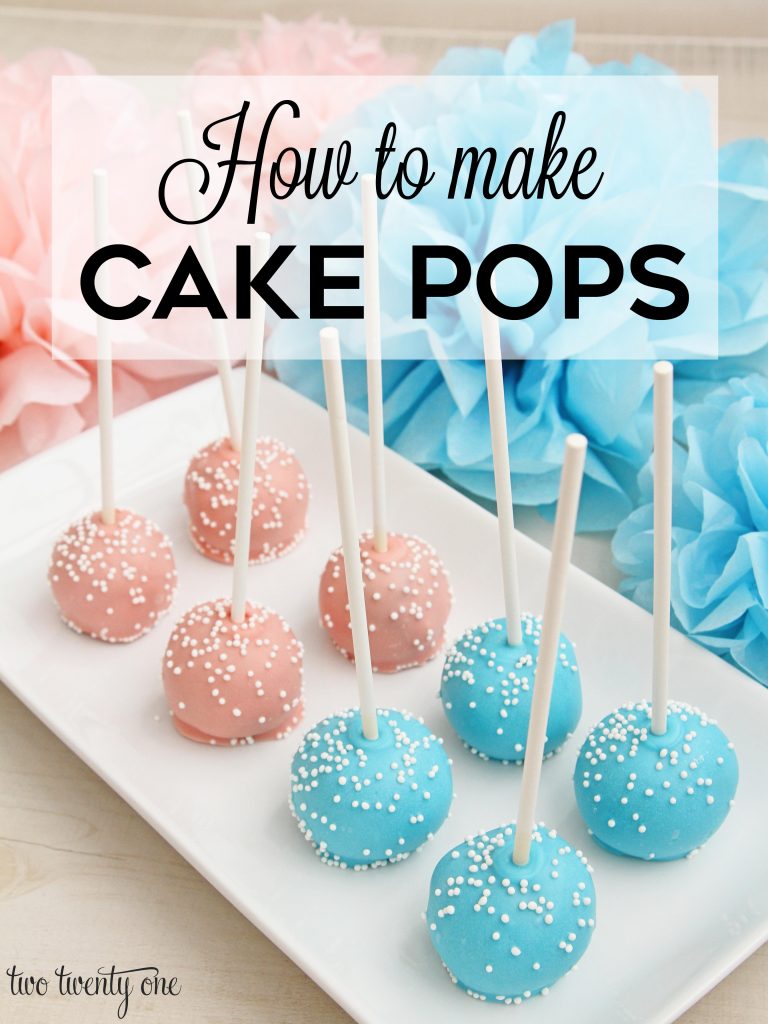
Credit: www.twotwentyone.net
Tools You Will Need
Baking pan
Mixing bowls
Spoon or spatula
Baking sheet
Parchment paper or wax paper
Microwave-safe bowl
Credit: preppykitchen.com
Step-by-Step Instructions
Step 1: Bake The Cake
First, make the cake. Follow the instructions on the box. Use the baking pan. Let the cake cool completely.
Step 2: Crumble The Cake
Once the cake is cool, crumble it into small pieces. Use your hands or a fork. Make sure there are no large chunks.
Step 3: Mix With Frosting
Next, add the frosting to the cake crumbs. Use a spoon or spatula. Mix until it forms a dough-like consistency. You may not need the whole can of frosting. Start with a little and add more as needed.
Step 4: Form Cake Balls
Take small amounts of the mixture. Roll them into balls. Each ball should be about the size of a golf ball. Place the balls on a baking sheet lined with parchment paper. Put the baking sheet in the freezer for 20 minutes.
Step 5: Insert Popsicle Sticks
After 20 minutes, take the cake balls out of the freezer. Insert a popsicle stick into each ball. Push the stick about halfway through. This will help the ball stay on the stick.
Step 6: Melt The Coating
While the cake balls are in the freezer, melt the chocolate or candy melts. Use a microwave-safe bowl. Heat in 30-second intervals. Stir after each interval. Continue until the coating is smooth and melted.
Step 7: Dip The Cake Popsicles
Take the cake balls out of the freezer. Dip each ball into the melted coating. Make sure the ball is fully covered. Let the excess coating drip off. Place the dipped cake popsicles back on the parchment paper.
Step 8: Add Toppings (optional)
If you want, add sprinkles or other toppings. Do this before the coating hardens. The toppings will stick better.
Step 9: Let Them Set
Let the cake popsicles sit until the coating is hard. You can put them in the fridge to speed up the process.
Step 10: Enjoy!
Your cake popsicles are ready to eat. Enjoy your homemade treat!
Tips for Success
Use a cake mix flavor you like.
Make sure the cake is completely cool before crumbling.
Add frosting a little at a time. You don't want the mixture too wet.
Freeze the cake balls before dipping. This helps them stay on the stick.
Work quickly when dipping. The coating hardens fast.
Get creative with toppings. Use sprinkles, nuts, or candy pieces.
FAQs About Cake Popsicles
Can I Use Homemade Cake?
Yes, you can use homemade cake. Just make sure it is completely cool before crumbling.
Do I Have To Use Frosting?
Frosting helps hold the cake together. You can try using cream cheese or peanut butter instead.
Can I Use White Chocolate?
Yes, you can use any type of chocolate or candy melts.
How Long Do Cake Popsicles Last?
Store cake popsicles in the fridge. They will last for about one week.
Can I Freeze Cake Popsicles?
Yes, you can freeze cake popsicles. Store them in an airtight container. They will last for up to three months.
Frequently Asked Questions
What Ingredients Do I Need For Cake Popsicles?
You need cake mix, frosting, candy melts, and popsicle sticks.
How Do You Make Cake Popsicles?
Bake the cake, crumble it, mix with frosting, shape, insert sticks, and dip in melted candy.
Can I Use Store-bought Cake For Cake Popsicles?
Yes, store-bought cake works well. It saves time and effort.
How Long Do Cake Popsicles Last?
Stored in the fridge, they last up to one week.
Conclusion
Cake popsicles are a fun and tasty treat. They are easy to make at home. Follow these simple steps to create your own. Enjoy making and eating cake popsicles with family and friends!
Comments